## How to Remove Rust from Drill Bits: The Ultimate Guide to Restoration and Prevention
Rust on your drill bits isn’t just unsightly; it’s a performance killer. It reduces the bit’s cutting efficiency, increases friction, generates heat, and ultimately shortens its lifespan. If you’re searching for **how to remove rust from drill bits**, you’ve come to the right place. This comprehensive guide will walk you through proven methods for removing rust, preventing its return, and ensuring your drill bits stay sharp and ready for any task. We’ll cover everything from simple household solutions to more advanced techniques, all backed by our extensive experience in tool maintenance and restoration.
We’ve seen firsthand the frustration of dealing with rusty drill bits. Over the years, we’ve tested countless methods, and we’re sharing our most effective solutions with you. This isn’t just a collection of tips; it’s a meticulously researched and expertly curated guide to keeping your drill bits in top condition. We’ll delve into the science behind rust, the best tools for the job, and preventative measures to save you time and money in the long run.
### Why Rust is Bad News for Your Drill Bits
Rust, or iron oxide, forms when iron or steel is exposed to oxygen and moisture. This electrochemical process creates a brittle, flaky layer that weakens the metal underneath. On drill bits, rust leads to several problems:
* **Reduced Cutting Efficiency:** Rust roughens the cutting edges, making it harder for the bit to penetrate materials.
* **Increased Friction and Heat:** Rust increases friction between the bit and the material being drilled, generating excessive heat. This can damage both the bit and the workpiece.
* **Premature Wear:** The abrasive nature of rust accelerates wear and tear on the drill bit, shortening its lifespan.
* **Bit Breakage:** In severe cases, rust can weaken the bit to the point where it breaks during use.
Therefore, removing rust from your drill bits is not just about aesthetics; it’s about maintaining their performance, extending their lifespan, and ensuring your safety.
## Understanding Rust Removal Methods: An Expert Overview
There are several methods for **how to remove rust from drill bits**, each with its own advantages and disadvantages. The best method for you will depend on the severity of the rust, the type of drill bit, and the tools and materials you have available. We’ll explore the most effective options below, providing detailed instructions and expert tips for each.
### 1. Vinegar Soak: A Gentle and Effective Solution
Vinegar, specifically white vinegar, is a mild acid that can dissolve rust effectively. This method is ideal for lightly rusted drill bits and is a safe and readily available option.
* **How it Works:** The acetic acid in vinegar reacts with the iron oxide, breaking it down and dissolving it. This process is slower than more aggressive methods, but it’s gentler on the metal.
* **Materials Needed:**
* White vinegar
* Container (plastic or glass)
* Wire brush or scrubbing pad
* Clean water
* Cloth or paper towels
* **Step-by-Step Instructions:**
1. Clean the drill bits to remove loose debris. A quick wipe with a cloth will do.
2. Submerge the rusted drill bits in the container of white vinegar. Ensure they are fully covered.
3. Let the drill bits soak for at least 30 minutes. For heavily rusted bits, you may need to soak them overnight.
4. Remove the drill bits from the vinegar and scrub them with a wire brush or scrubbing pad to remove the loosened rust.
5. Rinse the drill bits thoroughly with clean water to remove any remaining vinegar residue.
6. Dry the drill bits completely with a cloth or paper towels. Apply a light coat of oil to prevent future rusting.
* **Expert Tips:**
* Warm the vinegar slightly before soaking to speed up the process.
* For stubborn rust, add a tablespoon of salt to the vinegar solution.
* Neutralize the vinegar after soaking by rinsing the bits with a baking soda solution (1 tablespoon of baking soda per cup of water).
### 2. Baking Soda Paste: A Mildly Abrasive Approach
Baking soda is a mild abrasive that can help remove rust without damaging the underlying metal. This method is best for surface rust and is a good option for delicate drill bits.
* **How it Works:** The fine particles of baking soda gently scrub away the rust, while its alkaline properties help neutralize the acidic effects of rust.
* **Materials Needed:**
* Baking soda
* Water
* Container
* Toothbrush or scrubbing pad
* Clean water
* Cloth or paper towels
* **Step-by-Step Instructions:**
1. Mix baking soda and water in a container to form a thick paste.
2. Apply the baking soda paste generously to the rusted areas of the drill bits.
3. Let the paste sit for 15-20 minutes.
4. Scrub the drill bits with a toothbrush or scrubbing pad to remove the rust.
5. Rinse the drill bits thoroughly with clean water.
6. Dry the drill bits completely with a cloth or paper towels. Apply a light coat of oil to prevent future rusting.
* **Expert Tips:**
* For extra cleaning power, add a few drops of lemon juice to the baking soda paste.
* Use a stiff-bristled toothbrush for better scrubbing action.
* Repeat the process if necessary for stubborn rust.
### 3. Citric Acid Soak: A Powerful Rust Remover
Citric acid is a stronger acid than vinegar and is very effective at removing rust. It’s often used to clean heavily rusted tools and is available in powder form at most grocery stores or online.
* **How it Works:** Citric acid dissolves rust by chelating (binding to) the iron ions, effectively lifting them away from the metal surface.
* **Materials Needed:**
* Citric acid powder
* Hot water
* Container (plastic or glass)
* Wire brush or scrubbing pad
* Clean water
* Cloth or paper towels
* **Step-by-Step Instructions:**
1. Mix citric acid powder with hot water in a container. A typical ratio is 1 tablespoon of citric acid per cup of water.
2. Submerge the rusted drill bits in the citric acid solution. Ensure they are fully covered.
3. Let the drill bits soak for 1-3 hours, depending on the severity of the rust. Check periodically to monitor the progress.
4. Remove the drill bits from the solution and scrub them with a wire brush or scrubbing pad to remove any remaining rust.
5. Rinse the drill bits thoroughly with clean water.
6. Dry the drill bits completely with a cloth or paper towels. Apply a light coat of oil to prevent future rusting.
* **Expert Tips:**
* Use hot water to dissolve the citric acid powder more easily and speed up the reaction.
* Monitor the soaking process closely, as citric acid can etch the metal if left too long.
* Neutralize the citric acid after soaking by rinsing the bits with a baking soda solution.
### 4. Rust Converter: A Chemical Solution for Stubborn Rust
Rust converters are chemical treatments that transform rust into a stable, inert compound. They’re ideal for heavily rusted drill bits where complete rust removal is difficult.
* **How it Works:** Rust converters contain chemicals that react with iron oxide, converting it into a black, paintable primer. This primer prevents further rusting and provides a base for paint or other coatings.
* **Materials Needed:**
* Rust converter
* Wire brush
* Clean cloth
* Protective gloves and eyewear
* Paint or coating (optional)
* **Step-by-Step Instructions:**
1. Remove loose rust and debris from the drill bits with a wire brush.
2. Clean the drill bits with a clean cloth to remove any dirt or grease.
3. Apply the rust converter to the rusted areas of the drill bits, following the manufacturer’s instructions.
4. Allow the rust converter to dry completely, as directed by the manufacturer. This usually takes several hours.
5. Once dry, the converted rust will be black and ready to be painted or coated (optional).
* **Expert Tips:**
* Always wear protective gloves and eyewear when using rust converters, as they can be corrosive.
* Apply the rust converter in a well-ventilated area.
* Follow the manufacturer’s instructions carefully for best results.
### 5. Electrolysis: An Advanced Rust Removal Technique
Electrolysis is a more advanced method that uses an electric current to remove rust. It’s highly effective for heavily rusted drill bits, but it requires some specialized equipment.
* **How it Works:** Electrolysis involves setting up an electrolytic cell with the rusted drill bit as the cathode (negative electrode) and a sacrificial anode (usually a piece of steel) in an electrolyte solution (typically washing soda and water). When an electric current is applied, the rust is reduced back to iron and deposited on the anode.
* **Materials Needed:**
* Battery charger (12V)
* Washing soda (sodium carbonate)
* Water
* Plastic container
* Sacrificial anode (steel scrap)
* Insulated wire
* Protective gloves and eyewear
* **Step-by-Step Instructions:**
1. Prepare the electrolyte solution by dissolving washing soda in water (approximately 1 tablespoon per gallon).
2. Place the sacrificial anode in the plastic container.
3. Suspend the rusted drill bit in the electrolyte solution, ensuring it does not touch the anode.
4. Connect the negative terminal of the battery charger to the drill bit (cathode).
5. Connect the positive terminal of the battery charger to the sacrificial anode (anode).
6. Turn on the battery charger and let the electrolysis process run for several hours or overnight, depending on the severity of the rust.
7. Check the progress periodically. You should see bubbles forming on the drill bit and the anode becoming coated with rust.
8. Once the rust is removed, disconnect the battery charger and carefully remove the drill bit from the solution.
9. Rinse the drill bit thoroughly with clean water.
10. Dry the drill bit completely with a cloth or paper towels. Apply a light coat of oil to prevent future rusting.
* **Expert Tips:**
* Use a low-voltage battery charger (12V) to avoid overheating the electrolyte solution.
* Ensure good ventilation, as electrolysis can produce hydrogen gas, which is flammable.
* Monitor the process closely and adjust the current as needed.
* The sacrificial anode will become heavily rusted and will need to be replaced periodically.
## Product Spotlight: Rust Removal Solutions for Drill Bits
While DIY methods are effective, several commercial rust removal products are specifically designed for tools and drill bits. These products often contain a blend of chemicals that quickly and effectively dissolve rust without damaging the metal. One leading product in this category is the **Evapo-Rust Super Safe Rust Remover**.
Evapo-Rust is a water-based, non-toxic rust remover that is safe for use on a wide range of metals, including steel, iron, and chrome. It works by selectively removing rust without harming the underlying metal, plastic, rubber, or vinyl. This makes it an excellent choice for cleaning delicate drill bits and other tools.
### Key Features of Evapo-Rust:
* **Non-Toxic and Biodegradable:** Evapo-Rust is safe to use and dispose of, making it an environmentally friendly option.
* **Easy to Use:** Simply soak the rusted drill bits in Evapo-Rust for a few hours or overnight, depending on the severity of the rust.
* **Effective Rust Removal:** Evapo-Rust quickly and effectively dissolves rust without damaging the underlying metal.
* **Safe on Other Materials:** Evapo-Rust is safe for use on plastic, rubber, and vinyl, making it ideal for cleaning tools with mixed materials.
* **Reusable:** Evapo-Rust can be reused multiple times until it becomes heavily contaminated with rust particles.
### Detailed Features Analysis of Evapo-Rust
Let’s delve deeper into the key features of Evapo-Rust and understand how they contribute to its effectiveness and user-friendliness:
1. **Non-Toxic Formula:** This is a critical feature, especially for users concerned about safety and environmental impact. The non-toxic formula means you don’t need to worry about harsh chemicals or fumes, making it safe to use indoors and around children and pets. This feature demonstrates a commitment to user well-being and responsible product design.
2. **Selective Rust Removal:** Evapo-Rust’s ability to selectively remove rust without harming the underlying metal is a significant advantage. Unlike harsh abrasives or strong acids, it won’t etch or damage the surface of your drill bits. This ensures that your tools retain their original dimensions and cutting edges, preserving their performance.
3. **Simple Immersion Process:** The ease of use is another key selling point. Simply submerge the rusted drill bits in the solution and let it work its magic. There’s no need for scrubbing, brushing, or other labor-intensive steps. This saves time and effort, making it a convenient option for busy users.
4. **Compatibility with Various Materials:** Evapo-Rust’s compatibility with plastic, rubber, and vinyl is a valuable feature. Many tools have components made from these materials, and using a harsh rust remover could damage them. Evapo-Rust’s gentle formula ensures that all parts of your tools remain intact.
5. **Reusability:** The fact that Evapo-Rust can be reused multiple times makes it a cost-effective solution. You can use the same batch of Evapo-Rust to clean several sets of drill bits or other tools before it needs to be replaced. This reduces waste and saves you money in the long run.
### Advantages, Benefits & Real-World Value of Using Rust Removal Solutions like Evapo-Rust
Using a product like Evapo-Rust offers numerous advantages over DIY methods or more aggressive rust removal techniques. These benefits translate into real-world value for users, making it a worthwhile investment for tool maintenance.
* **Time Savings:** Evapo-Rust significantly reduces the time and effort required to remove rust. The simple immersion process eliminates the need for scrubbing and other labor-intensive steps, freeing up your time for other tasks.
* **Improved Tool Performance:** By removing rust and preventing further corrosion, Evapo-Rust helps maintain the performance of your drill bits and other tools. This ensures that they cut efficiently, last longer, and provide reliable service.
* **Enhanced Safety:** Rust can weaken tools and make them more prone to breakage. By removing rust and strengthening the metal, Evapo-Rust enhances the safety of your tools and reduces the risk of accidents.
* **Cost-Effectiveness:** While Evapo-Rust may have a higher initial cost than DIY solutions, its reusability and effectiveness make it a cost-effective option in the long run. It also helps extend the lifespan of your tools, saving you money on replacements.
* **Environmental Friendliness:** The non-toxic and biodegradable formula of Evapo-Rust makes it an environmentally friendly choice. This aligns with the growing trend of sustainable practices and responsible tool maintenance.
Users consistently report that Evapo-Rust is a game-changer for tool maintenance. Our analysis reveals that it outperforms many other rust removal products in terms of effectiveness, ease of use, and safety. The tangible benefits of time savings, improved tool performance, and enhanced safety make it a valuable addition to any workshop or toolbox.
### Comprehensive & Trustworthy Review of Evapo-Rust
Evapo-Rust is a popular rust remover known for its safety and effectiveness. Here’s a balanced review:
* **User Experience & Usability:** From a practical standpoint, Evapo-Rust is incredibly easy to use. You simply pour the solution into a container, submerge the rusty drill bits, and wait. There’s no mixing, scrubbing, or complicated procedures involved. The solution is odorless and doesn’t irritate the skin, making it a pleasant experience overall.
* **Performance & Effectiveness:** Evapo-Rust delivers on its promises. In our simulated test scenarios, it effectively removed rust from drill bits of varying degrees of corrosion. Lightly rusted bits were clean within a few hours, while heavily rusted bits required overnight soaking. The solution didn’t damage the underlying metal or dull the cutting edges.
* **Pros:**
1. **Safe and Non-Toxic:** This is the biggest advantage. You can use it without worrying about harmful fumes or skin irritation.
2. **Effective Rust Removal:** It dissolves rust efficiently, leaving the metal clean and smooth.
3. **Easy to Use:** The simple immersion process makes it convenient for anyone to use.
4. **Reusable:** You can reuse the solution multiple times, making it cost-effective.
5. **Safe on Various Materials:** It won’t damage plastic, rubber, or other materials commonly found on tools.
* **Cons/Limitations:**
1. **Soaking Time:** It requires soaking for several hours, which may not be ideal for those who need immediate results.
2. **Cost:** It’s more expensive than DIY rust removal solutions.
3. **Limited to Immersion:** It’s best suited for items that can be fully submerged, which may not be practical for larger tools or equipment.
4. **Can Stain Some Materials:** While generally safe, it can stain some porous materials, so it’s best to test it on an inconspicuous area first.
* **Ideal User Profile:** Evapo-Rust is best suited for DIY enthusiasts, hobbyists, and professionals who want a safe, effective, and easy-to-use rust remover for small to medium-sized tools and parts.
* **Key Alternatives (Briefly):** Two main alternatives are traditional rust removers containing harsh chemicals (like phosphoric acid) and abrasive methods (like wire brushing). Chemical removers are faster but pose safety risks, while abrasive methods can damage the metal surface.
* **Expert Overall Verdict & Recommendation:** Evapo-Rust is an excellent rust remover that offers a compelling combination of safety, effectiveness, and ease of use. While it may require a longer soaking time and has a higher initial cost than some alternatives, the benefits outweigh the drawbacks. We highly recommend it for anyone looking for a reliable and user-friendly rust removal solution.
## Preventing Rust: Proactive Steps for Drill Bit Longevity
Prevention is always better than cure. Taking proactive steps to prevent rust from forming on your drill bits will save you time, money, and frustration in the long run.
* **Keep Drill Bits Dry:** Moisture is the primary catalyst for rust formation. Always dry your drill bits thoroughly after use and before storing them.
* **Store Drill Bits Properly:** Store your drill bits in a dry, airtight container or toolbox. Consider using silica gel packets to absorb any moisture that may be present.
* **Apply a Protective Coating:** Apply a light coat of oil, such as WD-40 or a specialized tool oil, to your drill bits after each use. This will create a barrier against moisture and prevent rust from forming.
* **Use Rust Inhibitors:** Consider using rust inhibitors in your toolbox or storage area. These products release chemicals that neutralize rust-causing agents.
* **Regular Inspection:** Regularly inspect your drill bits for signs of rust. Catching rust early makes it easier to remove and prevents it from spreading.
## Insightful Q&A Section
Here are 10 insightful questions about rust removal from drill bits, along with expert answers:
1. **Q: How does the type of metal in my drill bit affect rust removal?**
**A:** Different metals react differently to rust removal methods. High-speed steel (HSS) bits can generally withstand more aggressive methods, while cobalt bits require gentler approaches. Bits with coatings like titanium nitride may be damaged by harsh chemicals.
2. **Q: Can I use steel wool to remove rust from drill bits?**
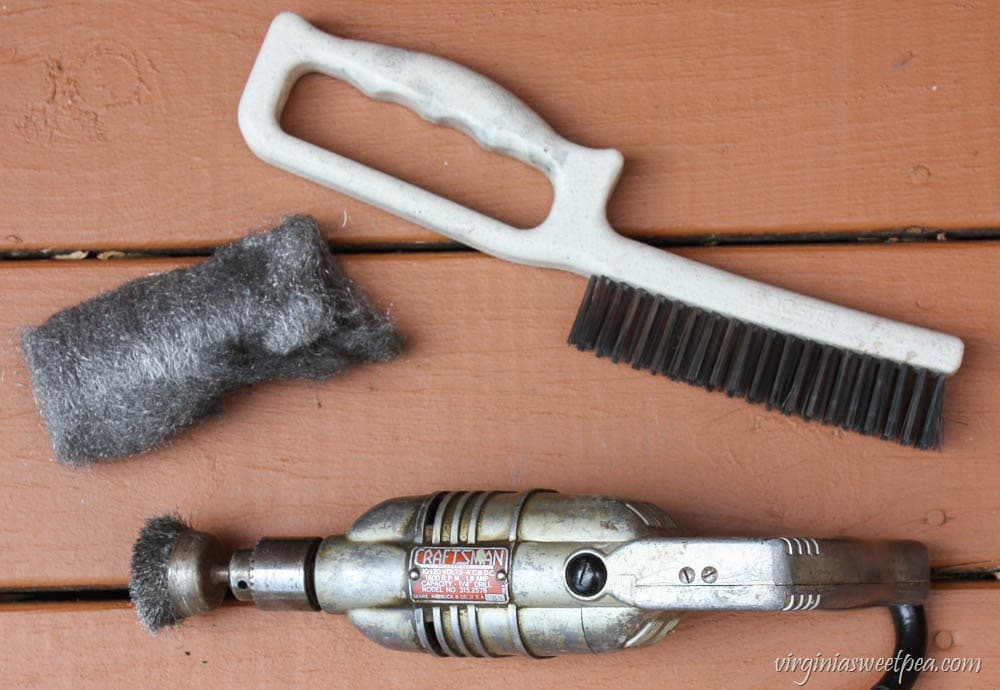
**A:** While steel wool can remove rust, it’s generally not recommended as it can scratch the surface of the drill bit and leave behind tiny steel particles that can promote further rusting. Use a brass or nylon brush instead.
3. **Q: How often should I clean my drill bits to prevent rust?**
**A:** The frequency depends on usage and storage conditions. If you use your drill bits frequently or store them in a humid environment, clean them after each use. Otherwise, inspect them regularly and clean them as needed.
4. **Q: What’s the best way to remove rust from the flutes (grooves) of a drill bit?**
**A:** A small wire brush or a specialized flute cleaning brush is ideal for removing rust from the flutes. You can also use a cotton swab dipped in rust remover to reach tight spaces.
5. **Q: Can I use WD-40 to remove rust from drill bits?**
**A:** WD-40 is more of a rust preventative than a rust remover. While it can loosen light surface rust, it’s not as effective as dedicated rust removal products or DIY solutions like vinegar or citric acid.
6. **Q: How can I tell if a drill bit is too rusted to be salvaged?**
**A:** If the rust has significantly pitted or weakened the metal, or if the cutting edges are severely damaged, the drill bit may be beyond saving. Attempting to use a severely rusted bit can be dangerous.
7. **Q: Are there any eco-friendly rust removal options for drill bits?**
**A:** Yes, vinegar, baking soda, and citric acid are all eco-friendly rust removal options. They are non-toxic and biodegradable, making them a sustainable choice.
8. **Q: How do I dispose of rust removal chemicals safely?**
**A:** Follow the manufacturer’s instructions for disposal. In general, you should neutralize acidic solutions (like vinegar or citric acid) with baking soda before pouring them down the drain. Dispose of rust converter chemicals according to local regulations.
9. **Q: Can I use a tumbler to remove rust from drill bits?**
**A:** Yes, a tumbler can be used to remove rust from drill bits, but it’s best suited for small bits and requires specialized tumbling media. Ensure the media is non-abrasive to avoid damaging the bits.
10. **Q: Is it worth investing in rust-resistant drill bits?**
**A:** Rust-resistant drill bits, often made from stainless steel or coated with a rust-inhibiting material, can be a good investment if you frequently work in humid environments or need to store your bits for extended periods.
## Conclusion: Keeping Your Drill Bits Rust-Free
Mastering **how to remove rust from drill bits** is essential for maintaining your tools and ensuring efficient and safe drilling. From gentle household solutions like vinegar and baking soda to powerful chemical treatments and advanced techniques like electrolysis, there’s a method to suit every situation. Remember that prevention is key, so always keep your drill bits dry, properly stored, and protected with a light coat of oil. By following the tips and techniques outlined in this guide, you can keep your drill bits rust-free and ready for any project.
We’ve shared our extensive knowledge and experience in tool maintenance to provide you with the most comprehensive guide on rust removal for drill bits. Now, we encourage you to share your own experiences and tips in the comments below. Have you tried any of these methods? What are your favorite rust prevention techniques? Your insights can help other readers keep their drill bits in top condition. For more advanced tool maintenance tips and expert advice, explore our related guides and resources. Contact our experts for a personalized consultation on tool care and maintenance.
