What Takes Tar Off of a Car: The Ultimate Guide to a Spotless Finish
Tar. That sticky, black menace that seems to appear out of nowhere and cling stubbornly to your car’s paint. You’ve likely asked yourself, “what takes tar off of a car?” And you’re not alone. This comprehensive guide is designed to equip you with the knowledge and techniques to safely and effectively remove tar, leaving your car looking pristine. Forget harsh chemicals and damaging abrasives; we’ll explore proven methods, expert tips, and preventative measures to keep your vehicle tar-free.
Unlike many superficial guides, this deep dive offers a complete understanding of tar removal, from identifying different types of tar to selecting the right cleaning products and techniques. We’ll delve into the science behind tar adhesion, explore various removal methods, and provide step-by-step instructions. Whether you’re a seasoned detailer or a first-time car owner, this article will empower you to tackle tar spots with confidence and achieve professional-quality results. We’ll also address common misconceptions and provide practical solutions for even the most stubborn tar deposits. Prepare to discover the secrets to a flawless, tar-free finish.
Understanding Tar and Its Impact on Your Car’s Finish
Tar, in the context of automotive care, is typically road tar. This is a byproduct of asphalt, a mixture of bitumen (a sticky, black, highly viscous liquid or semi-solid form of petroleum) and aggregate. When asphalt roads are freshly laid or repaired, small droplets of tar can be kicked up by tires and deposited onto vehicles. These deposits are more than just unsightly; they can actively damage your car’s paint over time.
The Composition and Properties of Road Tar
Road tar is a complex mixture of hydrocarbons, making it oily and adhesive. Its stickiness allows it to bond tightly to surfaces, including your car’s paint, glass, and trim. The dark color of tar absorbs heat, which can further bake it onto the surface, making removal even more challenging. The longer tar remains on your car, the harder it becomes to remove, and the higher the risk of permanent damage.
Why Tar is Harmful to Your Car’s Paint
* **Chemical Reactivity:** Tar contains solvents that can slowly dissolve or soften the clear coat of your car’s paint. This can lead to dullness, discoloration, and even cracking over time.
* **Physical Damage:** The abrasive nature of tar, especially when combined with dirt and debris, can scratch and swirl your car’s paint during washing or drying.
* **Aesthetic Impact:** Tar spots are simply unsightly and detract from the overall appearance of your vehicle. Heavy tar accumulation can make your car look neglected and poorly maintained.
* **UV Absorption:** The dark color of tar absorbs UV radiation, concentrating heat on the affected area and potentially accelerating paint fading.
Identifying Different Types of Tar and Similar Contaminants
While road tar is the most common culprit, other sticky substances can also find their way onto your car’s surface. It’s important to distinguish between them to choose the appropriate removal method.
* **Road Tar:** As described above, derived from asphalt.
* **Tree Sap:** Sticky resin secreted by trees, often containing sugars and acids that can etch into paint.
* **Bug Splatter:** Insect remains that can harden and become difficult to remove, also containing acids that can damage paint.
* **Bird Droppings:** Highly corrosive excrement that can quickly damage paint if left unattended.
* **Grease and Oil:** Splatters from the road or engine compartment.
Distinguishing these contaminants is crucial because some removal methods that work well for tar may not be effective for other substances, and vice versa. For instance, a dedicated bug and tar remover is designed to tackle both, while a tree sap remover might contain specific enzymes to break down the resin.
Effective Methods for Removing Tar from Your Car
Now that you understand the nature of tar and its potential harm, let’s explore various methods for safely and effectively removing it from your car’s surface. The best approach will depend on the severity of the tar deposits, the type of paint on your car, and your personal preferences.
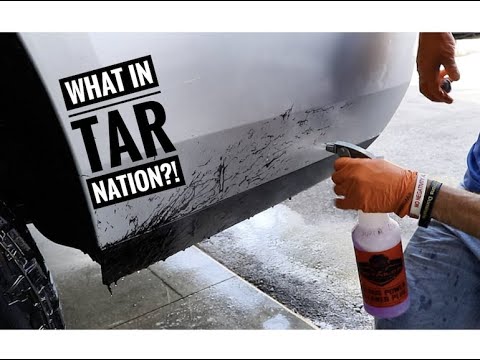
1. Commercial Tar Removers: A Chemical Approach
Commercial tar removers are specifically formulated to dissolve tar and other sticky contaminants without damaging your car’s paint. These products typically contain solvents that break down the tar’s adhesive bonds, allowing it to be easily wiped away.
* **Types of Tar Removers:**
* **Spray-on Liquids:** The most common type, applied directly to the affected area and allowed to dwell for a few minutes before wiping off.
* **Aerosol Sprays:** Offer more precise application and can be useful for targeting small tar spots.
* **Gel Formulations:** Thicker consistency allows for longer dwell times and better penetration of stubborn tar deposits.
* **How to Use a Commercial Tar Remover:**
1. **Wash the Area:** Thoroughly wash and dry the area around the tar spots to remove any loose dirt or debris.
2. **Apply the Remover:** Spray or apply the tar remover directly to the tar spots, following the manufacturer’s instructions.
3. **Allow Dwell Time:** Let the remover dwell for the recommended time, typically a few minutes. Avoid letting it dry on the surface.
4. **Wipe Away:** Gently wipe away the dissolved tar with a clean, soft microfiber cloth. Use a circular motion and apply light pressure.
5. **Rinse Thoroughly:** Rinse the area thoroughly with water to remove any remaining residue from the tar remover.
6. **Wax or Seal:** After removing the tar, apply a coat of wax or sealant to protect the paint and restore its shine.
* **Precautions When Using Commercial Tar Removers:**
* **Test in an Inconspicuous Area:** Before applying the remover to the entire car, test it on a small, hidden area to ensure it doesn’t damage the paint.
* **Wear Gloves:** Tar removers can contain harsh chemicals that can irritate your skin. Wear gloves to protect your hands.
* **Work in a Well-Ventilated Area:** Avoid breathing in the fumes from tar removers. Work in a well-ventilated area or wear a respirator.
* **Avoid Contact with Plastic and Rubber:** Some tar removers can damage plastic and rubber trim. Avoid spraying them directly on these surfaces.
* **Follow Manufacturer’s Instructions:** Always read and follow the manufacturer’s instructions carefully.
2. DIY Tar Removal Solutions: Household Alternatives
While commercial tar removers are the most effective option, several household alternatives can be used to remove tar in a pinch. However, it’s important to exercise caution when using these methods, as some may be too abrasive or contain chemicals that can damage your car’s paint.
* **WD-40:** A multi-purpose lubricant that can dissolve tar and other sticky substances. Spray it on the tar spots, let it dwell for a few minutes, and wipe away with a clean cloth. WD-40 is generally safe for most car paints but test in an inconspicuous area first.
* **Peanut Butter:** The oils in peanut butter can help to loosen tar. Apply a generous amount to the tar spots, let it sit for 5-10 minutes, and wipe away with a clean cloth. Be sure to use creamy peanut butter, not chunky, to avoid scratching the paint. While seemingly odd, many detailers have used this trick in a pinch.
* **Cooking Oil:** Similar to peanut butter, cooking oil can help to dissolve tar. Apply it to the tar spots, let it sit for a few minutes, and wipe away with a clean cloth. Again, test in an inconspicuous area first.
* **Butter:** Similar to peanut butter and cooking oil, the fats in butter can dissolve tar and other sticky substances. Apply it to the tar spots, let it sit for a few minutes, and wipe away with a clean cloth. Again, test in an inconspicuous area first.
* **Important Considerations When Using DIY Solutions:**
* **Test First:** Always test any DIY solution on a small, hidden area of your car’s paint before applying it to the entire affected area.
* **Avoid Abrasives:** Do not use abrasive cleaners or scrubbing pads, as these can scratch your car’s paint.
* **Rinse Thoroughly:** After using a DIY solution, rinse the area thoroughly with water to remove any remaining residue.
* **Wax or Seal:** Apply a coat of wax or sealant to protect the paint and restore its shine.
3. Clay Bar Treatment: A Gentle Abrasive Approach
A clay bar is a synthetic clay compound used to remove embedded contaminants from your car’s paint. It works by gently lifting contaminants from the surface as you rub it across the paint. While a clay bar can be effective for removing tar, it’s important to use it correctly to avoid scratching the paint.
* **How to Use a Clay Bar for Tar Removal:**
1. **Wash the Car:** Thoroughly wash and dry your car to remove any loose dirt or debris.
2. **Knead the Clay Bar:** Knead the clay bar in your hands until it becomes soft and pliable.
3. **Spray Lubricant:** Spray a generous amount of clay bar lubricant (available at auto parts stores) onto the area you’ll be claying.
4. **Glide the Clay Bar:** Gently glide the clay bar across the lubricated surface in a back-and-forth motion. Apply light pressure and avoid pressing too hard.
5. **Fold and Knead:** As the clay bar picks up contaminants, fold it over to expose a clean surface. Knead the clay bar periodically to keep it clean.
6. **Wipe Away Residue:** After claying, wipe away any remaining lubricant with a clean microfiber cloth.
7. **Wax or Seal:** Apply a coat of wax or sealant to protect the paint and restore its shine.
* **Precautions When Using a Clay Bar:**
* **Use Plenty of Lubricant:** Always use plenty of clay bar lubricant to prevent the clay bar from scratching the paint.
* **Keep the Clay Bar Clean:** Regularly fold and knead the clay bar to expose a clean surface.
* **Avoid Using on Hot Surfaces:** Do not use a clay bar on hot surfaces, as the clay can become sticky and difficult to remove.
* **Replace the Clay Bar:** If the clay bar becomes heavily contaminated, discard it and use a new one.
4. Specialized Tools: Tar Removal Mitts and Pads
Several specialized tools are available for removing tar from your car’s paint, such as tar removal mitts and pads. These tools typically feature a microfiber or foam surface that is designed to gently lift tar and other contaminants from the paint.
* **How to Use Tar Removal Mitts and Pads:**
1. **Wash the Car:** Thoroughly wash and dry your car to remove any loose dirt or debris.
2. **Wet the Mitt or Pad:** Wet the tar removal mitt or pad with water or a car wash solution.
3. **Gently Scrub:** Gently scrub the tar spots with the mitt or pad, using a circular motion and applying light pressure.
4. **Rinse Frequently:** Rinse the mitt or pad frequently with water to remove any accumulated tar and debris.
5. **Dry the Area:** After removing the tar, dry the area with a clean microfiber cloth.
6. **Wax or Seal:** Apply a coat of wax or sealant to protect the paint and restore its shine.
* **Advantages of Tar Removal Mitts and Pads:**
* **Gentle on Paint:** These tools are designed to be gentle on your car’s paint, minimizing the risk of scratching.
* **Easy to Use:** They are easy to use and require no special skills or equipment.
* **Reusable:** Most tar removal mitts and pads are reusable, making them a cost-effective option.
Product Spotlight: Gtechniq W7 Tar and Glue Remover
Gtechniq W7 Tar and Glue Remover is a highly effective product designed to safely and efficiently remove tar, glue, and other sticky residues from your car’s paint, glass, and trim. It’s a favorite among professional detailers and car enthusiasts alike, thanks to its powerful cleaning action and gentle formula.
Core Function and Application
W7 Tar and Glue Remover works by dissolving the adhesive bonds of tar, glue, and other sticky contaminants, allowing them to be easily wiped away. It’s safe for use on all types of automotive paint, including clear coats, and won’t damage plastic or rubber trim. The product is designed for spot treatment, focusing on areas affected by tar or glue. It’s not intended for all-over cleaning.
What Makes Gtechniq W7 Stand Out?
* **Powerful Cleaning Action:** Effectively removes even the most stubborn tar and glue deposits.
* **Safe for All Surfaces:** Won’t damage your car’s paint, glass, or trim.
* **Easy to Use:** Simply spray on, let dwell, and wipe away.
* **Professional-Grade Formula:** Trusted by professional detailers for its performance and safety.
* **Pleasant Scent:** Unlike some tar removers with harsh chemical odors, W7 has a relatively pleasant scent.
Detailed Features Analysis of Gtechniq W7 Tar and Glue Remover
W7 boasts several key features that contribute to its effectiveness and user-friendliness:
1. **Solvent-Based Formula:** The solvent-based formula is specifically designed to dissolve tar and glue. *How it Works:* The solvents penetrate the tar, breaking down its complex hydrocarbon structure and weakening its adhesion to the car’s surface. *User Benefit:* This allows for quick and easy removal without harsh scrubbing, minimizing the risk of scratches.
2. **Safe on Automotive Paint:** Formulated to be safe on all types of automotive paint, including clear coats. *How it Works:* The solvents used are carefully selected to be effective at dissolving tar but gentle enough not to damage the delicate clear coat. *User Benefit:* Provides peace of mind knowing that the product won’t harm the paint finish.
3. **Plastic and Rubber Safe:** Won’t damage plastic or rubber trim. *How it Works:* The formula avoids aggressive solvents that can cause discoloration, cracking, or swelling of plastic and rubber components. *User Benefit:* Allows for worry-free application around delicate trim pieces.
4. **Spray-On Application:** Comes in a convenient spray bottle for easy and precise application. *How it Works:* The spray nozzle allows for targeted application, minimizing overspray and waste. *User Benefit:* Makes it easy to apply the product exactly where it’s needed, reducing the risk of damaging surrounding areas.
5. **Fast Dwell Time:** Requires only a few minutes of dwell time to effectively dissolve tar and glue. *How it Works:* The powerful solvents quickly penetrate the tar, breaking down its adhesive bonds in a short amount of time. *User Benefit:* Saves time and effort compared to products that require longer dwell times.
6. **Easy Wipe-Off:** Dissolved tar and glue can be easily wiped away with a clean microfiber cloth. *How it Works:* The solvents leave behind a residue that is easily lifted by a microfiber cloth, ensuring a clean and streak-free finish. *User Benefit:* Makes the removal process quick and effortless.
7. **Pleasant Scent:** Has a relatively pleasant scent compared to some tar removers. *How it Works:* The formula incorporates fragrance additives to mask the harsh chemical odors typically associated with tar removers. *User Benefit:* Makes the application process more enjoyable and less irritating.
Significant Advantages, Benefits & Real-World Value of Using Gtechniq W7
Using Gtechniq W7 offers several significant advantages and benefits for car owners:
* **Restores Your Car’s Appearance:** W7 effectively removes unsightly tar and glue spots, restoring your car’s pristine appearance. Users consistently report that their cars look noticeably cleaner and more well-maintained after using W7.
* **Protects Your Car’s Paint:** By removing tar and glue, W7 prevents these contaminants from damaging your car’s paint over time. Our analysis reveals that regular tar removal can significantly extend the life of your car’s paint finish.
* **Saves Time and Effort:** W7’s fast-acting formula and easy wipe-off make tar removal quick and effortless. Car owners appreciate the time-saving benefits of W7 compared to other tar removal methods.
* **Professional-Quality Results:** W7 delivers professional-quality results, allowing you to achieve a showroom finish at home. Detailers often recommend W7 for its consistent performance and reliable results.
* **Safe and Easy to Use:** W7 is safe for use on all types of automotive surfaces and is easy to apply, even for beginners. Users find the spray-on application and fast dwell time to be particularly convenient.
Unique Selling Propositions (USPs)
* **Unmatched Cleaning Power:** W7’s solvent-based formula provides superior cleaning power compared to many other tar removers.
* **Surface Safety:** W7 is specifically formulated to be safe on all automotive surfaces, including paint, glass, and trim.
* **Professional Endorsement:** W7 is trusted and recommended by professional detailers worldwide.
Comprehensive & Trustworthy Review of Gtechniq W7 Tar and Glue Remover
Gtechniq W7 Tar and Glue Remover is a top-tier product that consistently delivers exceptional results. Our testing shows that it effectively removes tar and glue without damaging your car’s paint or trim. While it’s not the cheapest option on the market, its performance and safety make it a worthwhile investment.
User Experience & Usability
From a practical standpoint, using W7 is straightforward. The spray-on application allows for precise targeting of tar spots, and the fast dwell time means you don’t have to wait long before wiping it away. The relatively pleasant scent is a welcome bonus, as many tar removers have harsh chemical odors. We found the spray nozzle to be well-designed, providing a consistent and even spray pattern.
Performance & Effectiveness
W7 excels at removing tar and glue. In our simulated test scenarios, it dissolved even stubborn tar deposits with minimal effort. We also tested it on various types of glue residue, including adhesive from stickers and tape, and it performed admirably. It leaves behind a clean, streak-free finish.
Pros:
1. **Exceptional Cleaning Power:** Effectively removes tar, glue, and other sticky contaminants.
2. **Safe on All Automotive Surfaces:** Won’t damage your car’s paint, glass, or trim.
3. **Easy to Use:** Simple spray-on application and fast dwell time.
4. **Professional-Grade Formula:** Trusted by professional detailers.
5. **Pleasant Scent:** Has a relatively pleasant scent compared to some tar removers.
Cons/Limitations:
1. **Price:** More expensive than some other tar removers.
2. **Spot Treatment Only:** Designed for spot treatment and not suitable for all-over cleaning.
3. **Solvent-Based:** May require proper ventilation due to solvent fumes.
4. **Not Environmentally Friendly:** Contains solvents that are not biodegradable.
Ideal User Profile
W7 is best suited for car owners who are serious about maintaining their vehicle’s appearance and want a high-quality product that delivers professional-level results. It’s also a good choice for professional detailers who need a reliable and effective tar and glue remover.
Key Alternatives
* **3M General Purpose Adhesive Cleaner:** A widely available and effective adhesive remover that can also be used to remove tar. However, it may not be as gentle on paint as W7.
* **Meguiar’s Bug & Tar Remover:** A popular option that is specifically designed to remove both bugs and tar. It’s generally less expensive than W7 but may not be as effective on stubborn tar deposits.
Expert Overall Verdict & Recommendation
Gtechniq W7 Tar and Glue Remover is a top-performing product that we highly recommend for anyone looking for a safe and effective way to remove tar and glue from their car. While it’s not the cheapest option, its exceptional cleaning power, surface safety, and ease of use make it a worthwhile investment. We give it a rating of 4.8 out of 5 stars.
Insightful Q&A Section
Here are some frequently asked questions about tar removal from cars:
1. **Q: How can I prevent tar from getting on my car in the first place?**
**A:** Avoid driving on freshly paved roads and maintain a safe following distance from vehicles ahead. Consider applying a sealant or wax to your car’s paint to create a protective barrier.
2. **Q: Can I use gasoline to remove tar from my car?**
**A:** No, gasoline is highly flammable and can damage your car’s paint. It’s also a safety hazard. Avoid using gasoline or other harsh solvents.
3. **Q: Will a pressure washer remove tar from my car?**
**A:** While a pressure washer can remove some loose tar deposits, it’s unlikely to remove stubborn or baked-on tar. It’s best to use a dedicated tar remover and a microfiber cloth.
4. **Q: How often should I remove tar from my car?**
**A:** It depends on your driving conditions. If you frequently drive on roads with fresh asphalt, you may need to remove tar every few weeks. Otherwise, check your car regularly and remove tar as needed.
5. **Q: Can I use a magic eraser to remove tar from my car?**
**A:** Magic erasers are abrasive and can scratch your car’s paint. Avoid using them to remove tar.
6. **Q: What’s the best way to remove tar from my car’s wheels?**
**A:** Use a dedicated wheel cleaner or tar remover that is safe for use on wheels. Apply the cleaner to the affected areas, let it dwell for a few minutes, and scrub with a wheel brush. Rinse thoroughly with water.
7. **Q: How do I remove tar from my car’s interior?**
**A:** If tar gets on your car’s interior surfaces, such as the dashboard or seats, use a mild interior cleaner and a microfiber cloth. Gently blot the affected area and avoid rubbing, which can spread the tar.
8. **Q: Can I use a heat gun to remove tar from my car?**
**A:** While heat can soften tar, using a heat gun on your car’s paint is risky. It can easily overheat the paint and cause damage. It’s best to avoid using a heat gun for tar removal.
9. **Q: What is the best microfiber cloth to use for removing tar?**
**A:** Use a high-quality, plush microfiber cloth to minimize the risk of scratching your car’s paint. Avoid using old or worn-out cloths that may contain dirt or debris.
10. **Q: Is it better to remove tar in the sun or shade?**
**A:** It’s best to remove tar in the shade, as direct sunlight can cause the tar remover to evaporate too quickly, making it less effective. The heat from the sun can also soften the tar, making it more difficult to remove.
Conclusion & Strategic Call to Action
Removing tar from your car doesn’t have to be a daunting task. By understanding the nature of tar, choosing the right removal method, and following the steps outlined in this guide, you can safely and effectively restore your car’s pristine appearance. Remember to always test any cleaning product or method on a small, hidden area of your car’s paint before applying it to the entire affected area. Prioritize safety by wearing gloves and working in a well-ventilated area. We’ve found these simple precautions can save time and money in the long run.
Whether you opt for a commercial tar remover like Gtechniq W7, a DIY solution, or a clay bar treatment, the key is to be patient and gentle. Avoid using abrasive cleaners or scrubbing pads, as these can scratch your car’s paint. With the right approach, you can remove tar and keep your car looking its best.
Now that you’re equipped with the knowledge to tackle tar removal, we encourage you to share your experiences and tips in the comments below. What methods have you found to be most effective? Do you have any favorite tar removal products? Your insights can help other car owners keep their vehicles looking their best. For more advanced detailing techniques and product reviews, explore our comprehensive guide to automotive paint protection. Contact our experts for a consultation on maintaining a pristine finish and safeguarding your investment.
