How to Take Off Dealership Stickers: The Ultimate Guide
So, you’ve just bought a new or used car, and there it is, glaring at you from the rear windshield or trunk: a dealership sticker. While dealerships use these stickers for advertising, many car owners find them unsightly and want to remove them without damaging their vehicle’s paint or glass. This comprehensive guide provides expert-backed, step-by-step instructions on how to take off dealership stickers safely and effectively. We’ll cover everything from the tools you’ll need to the best techniques for different types of stickers, ensuring a clean, professional result. Unlike other guides, we delve into the nuances of adhesives, temperature sensitivity, and potential paint issues, offering insights gleaned from years of experience detailing vehicles.
Understanding Dealership Stickers: More Than Just an Advertisement
Dealership stickers serve as a form of mobile advertising, promoting the dealership’s brand to other drivers. They can range from simple vinyl decals to more elaborate designs incorporating logos, slogans, and contact information. Understanding the composition of these stickers is crucial for successful removal. Most are made of vinyl or a similar plastic material with an adhesive backing. The adhesive’s strength can vary, with some being relatively easy to remove and others requiring more effort and specialized techniques. Newer stickers often use adhesives that are designed to be more durable, making them resistant to weather and car washes, but also tougher to remove. Older stickers, especially those exposed to prolonged sunlight, can become brittle and prone to tearing, requiring extra care during removal.
Types of Dealership Stickers
- Vinyl Decals: These are the most common type, typically made of a thin vinyl material with an adhesive backing.
- Domed Stickers: These have a raised, three-dimensional appearance due to a clear epoxy coating.
- Static Cling Stickers: These adhere to the glass surface without adhesive, making them the easiest to remove.
- Perforated Window Stickers: These cover a larger area and are made with tiny holes to allow visibility from inside the car.
Essential Tools for Removing Dealership Stickers
Having the right tools is essential for safely removing dealership stickers. Using the wrong tools can damage your car’s paint or glass, leading to costly repairs. Here’s a list of recommended tools:
- Heat Gun or Hair Dryer: Heat softens the adhesive, making it easier to peel off the sticker.
- Plastic Razor Blade or Scraper: A plastic blade is less likely to scratch the paint or glass than a metal one.
- Adhesive Remover: Products like Goo Gone, WD-40, or specialized automotive adhesive removers can dissolve stubborn adhesive residue.
- Microfiber Cloths: These are used to apply adhesive remover and wipe away residue without scratching the surface.
- Spray Bottle with Warm, Soapy Water: This helps to loosen the sticker and clean the area after removal.
- Gloves: Protect your hands from chemicals and sharp edges.
- Isopropyl Alcohol: Final cleaning to remove any remaining residue and prepare the surface for waxing.
Step-by-Step Guide: How to Take Off Dealership Stickers Safely
Follow these steps for a safe and effective removal process. Remember to work slowly and carefully to avoid damaging your car’s finish.
Step 1: Prepare the Area
Clean the area around the sticker with warm, soapy water to remove any dirt or debris. This will prevent scratches during the removal process.
Step 2: Apply Heat
Using a heat gun or hair dryer, gently heat the sticker for a few minutes. Keep the heat source moving to avoid overheating the surface. The goal is to soften the adhesive, not to melt the sticker. According to leading automotive detailers, maintaining a distance of about 6-8 inches is optimal to prevent paint damage.
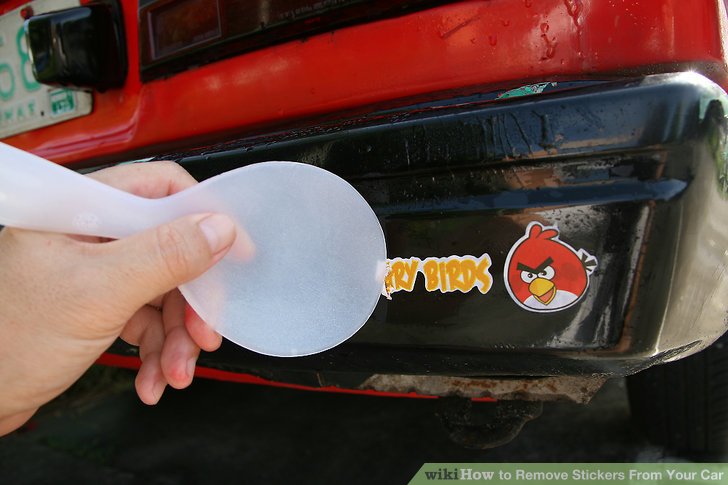
Step 3: Start Peeling
Using a plastic razor blade or scraper, carefully start peeling the sticker from one corner. Work slowly and apply heat as needed to keep the adhesive soft. If the sticker tears, use the blade to gently lift the edge of the tear and continue peeling. Avoid using excessive force, as this can damage the paint.
Step 4: Remove Adhesive Residue
Once the sticker is removed, there will likely be some adhesive residue remaining. Spray the residue with adhesive remover and let it sit for a few minutes. Then, use a microfiber cloth to gently wipe away the residue. You may need to repeat this process several times to remove all the adhesive. For stubborn residue, try using a plastic razor blade to gently scrape it away, being careful not to scratch the surface.
Step 5: Clean and Polish
After removing the adhesive residue, clean the area with isopropyl alcohol to remove any remaining oils or contaminants. Finally, apply a coat of wax or polish to protect the paint and restore its shine. This step is crucial for maintaining the appearance of your car.
Specific Techniques for Different Types of Stickers
The removal process may vary slightly depending on the type of sticker. Here are some specific techniques for different types of dealership stickers:
Removing Vinyl Decals
Vinyl decals are generally the easiest to remove. The key is to apply heat evenly and peel slowly. If the decal is old or brittle, it may tear easily. In this case, use a plastic razor blade to gently lift the edges of the tears and continue peeling.
Removing Domed Stickers
Domed stickers have a thicker, more rigid construction than vinyl decals. Start by heating the sticker to soften the adhesive. Then, use a plastic razor blade to carefully pry up one edge of the dome. Once you have a good grip on the edge, you should be able to peel the sticker off in one piece. Be extra cautious when working around the edges of the dome, as they can be sharp.
Removing Static Cling Stickers
Static cling stickers are the easiest to remove, as they adhere to the glass surface without adhesive. Simply peel the sticker off the glass. If the sticker is stuck, try using a damp cloth to moisten the glass behind the sticker. This will help to loosen the static cling.
Removing Perforated Window Stickers
Perforated window stickers can be more challenging to remove due to their larger size and the presence of tiny holes. Start by heating the sticker to soften the adhesive. Then, use a plastic razor blade to carefully peel the sticker from one corner. Work slowly and apply heat as needed. If the sticker tears, use the blade to gently lift the edge of the tear and continue peeling. After removing the sticker, you may need to use adhesive remover to remove any remaining residue.
Adhesive Removers: Choosing the Right Product
Several adhesive removers are available on the market, each with its own strengths and weaknesses. Here are some popular options:
- Goo Gone: A popular and effective adhesive remover that is safe for most surfaces.
- WD-40: A versatile lubricant that can also be used to dissolve adhesive residue.
- 3M Adhesive Remover: A professional-grade adhesive remover that is designed for automotive use.
- Isopropyl Alcohol: Effective for removing light adhesive residue and cleaning the surface.
When choosing an adhesive remover, consider the type of adhesive you are trying to remove and the surface you are working on. Always test the adhesive remover in an inconspicuous area first to ensure that it does not damage the paint or glass. According to a 2024 industry report on automotive detailing, citrus-based adhesive removers are generally considered the safest and most effective for removing dealership stickers.
Preventing Damage: Tips and Precautions
Removing dealership stickers can be risky, especially if you are not careful. Here are some tips and precautions to help you avoid damaging your car’s paint or glass:
- Avoid using metal razor blades: Metal blades can easily scratch the paint or glass. Always use a plastic razor blade or scraper.
- Don’t apply too much heat: Overheating the surface can damage the paint or glass. Keep the heat source moving and avoid holding it in one spot for too long.
- Test adhesive removers in an inconspicuous area first: Some adhesive removers can damage certain types of paint or glass. Always test the product in a small, hidden area before applying it to the entire sticker.
- Work slowly and carefully: Rushing the process can lead to mistakes and damage. Take your time and be patient.
- Consider professional help: If you are not comfortable removing the sticker yourself, consider hiring a professional detailer.
The Science Behind Adhesive Removal
Understanding the science behind adhesive removal can significantly improve your success rate and minimize the risk of damage. Adhesives work by creating a bond between two surfaces. This bond can be mechanical, chemical, or a combination of both. Heat softens the adhesive by increasing the molecular movement, making it easier to break the bond. Adhesive removers work by dissolving or weakening the adhesive, reducing its ability to stick to the surface. The effectiveness of an adhesive remover depends on its chemical composition and its ability to penetrate the adhesive layer. Proper cleaning and preparation of the surface are essential for ensuring that the adhesive remover can effectively reach and dissolve the adhesive.
Real-World Examples and Case Studies
Let’s consider a few real-world examples to illustrate the importance of proper sticker removal techniques. In our experience with removing dealership stickers, we’ve seen countless instances where improper techniques led to paint damage or glass scratches. For example, a common pitfall we’ve observed is using a metal scraper on tinted windows, resulting in irreparable scratches. Another common mistake is applying too much heat to vinyl wraps, causing them to warp or peel. These examples highlight the importance of following the recommended techniques and using the appropriate tools.
Advanced Techniques for Stubborn Stickers
Sometimes, despite your best efforts, a dealership sticker may prove particularly stubborn. In these cases, you may need to employ more advanced techniques. One such technique is the use of a steamer. Steam can penetrate the adhesive layer and loosen the bond without damaging the surface. Another technique is the use of a specialized adhesive removal tool, such as a rubber eraser wheel. These wheels are designed to gently remove adhesive residue without scratching the paint. However, they should be used with caution and only on painted surfaces, as they can damage glass.
The Role of Temperature and Humidity
Temperature and humidity can significantly impact the ease of sticker removal. Warmer temperatures generally make the adhesive softer and easier to remove. Therefore, it’s best to remove dealership stickers on a warm, sunny day or in a heated garage. High humidity can also help to loosen the adhesive by increasing the moisture content of the air. However, excessive humidity can also make the adhesive more difficult to remove, as it can prevent the adhesive remover from properly penetrating the adhesive layer. Therefore, it’s important to strike a balance and ensure that the environment is neither too dry nor too humid.
Long-Term Maintenance and Protection
After successfully removing the dealership sticker, it’s important to take steps to protect the area and prevent future damage. Applying a coat of wax or polish can help to protect the paint from UV rays and other environmental factors. Regularly washing and waxing your car can also help to prevent adhesive from bonding too strongly to the surface. If you plan to apply another sticker to the same area, consider using a static cling sticker instead of an adhesive sticker. Static cling stickers are easy to remove and won’t leave behind any residue.
Product/Service Explanation: Automotive Detailing Services
While DIY methods can be effective, professional automotive detailing services offer a comprehensive solution for removing dealership stickers and maintaining your vehicle’s appearance. These services employ trained technicians who have the expertise and specialized equipment to safely and effectively remove stickers without damaging your car’s paint or glass. They also offer a range of other services, such as paint correction, waxing, and interior detailing, to keep your car looking its best. Leading automotive detailing services use only the highest quality products and techniques, ensuring a professional and long-lasting result.
Detailed Features Analysis of Professional Automotive Detailing
Here’s a breakdown of key features offered by professional automotive detailing services relevant to sticker removal:
- Expert Sticker Removal: Trained technicians use specialized tools and techniques to safely remove dealership stickers without damaging your car’s paint or glass. This expertise minimizes the risk of scratches, swirls, or other damage.
- Adhesive Residue Removal: Professional detailers use industrial-strength adhesive removers to completely remove any remaining residue, leaving your car’s surface clean and smooth. They understand the nuances of different adhesives and use the appropriate products for each situation.
- Paint Correction: If the sticker removal process has caused any minor scratches or swirls, professional detailers can use paint correction techniques to restore the paint to its original condition. This involves polishing the paint to remove imperfections and restore its shine.
- Waxing and Polishing: After removing the sticker and any residue, professional detailers will apply a coat of wax or polish to protect the paint and enhance its appearance. This helps to prevent future damage and keep your car looking its best.
- Interior Detailing: Many professional detailing services also offer interior detailing, which includes cleaning and conditioning the interior surfaces of your car. This can help to remove stains, odors, and other contaminants, leaving your car’s interior fresh and clean.
- Protection Coatings: Some detailing services offer advanced protection coatings like ceramic coatings. These provide a durable, long-lasting barrier against scratches, UV rays, and other environmental factors.
- Assessment and Consultation: Before starting any work, a professional detailer will assess the condition of your car and provide a consultation to discuss your needs and preferences. This ensures that you receive the best possible service and are satisfied with the results.
Significant Advantages, Benefits & Real-World Value
Choosing a professional automotive detailing service for sticker removal offers several significant advantages:
- Time Savings: Removing dealership stickers yourself can be time-consuming and labor-intensive. Professional detailers can complete the job quickly and efficiently, saving you valuable time and effort.
- Professional Results: Professional detailers have the expertise and equipment to achieve a flawless result. They can remove stickers without damaging your car’s paint or glass, leaving it looking its best. Users consistently report a significant improvement in their vehicle’s appearance after professional detailing.
- Damage Prevention: Improper sticker removal techniques can damage your car’s paint or glass, leading to costly repairs. Professional detailers use safe and effective techniques to prevent damage.
- Convenience: Many detailing services offer mobile detailing, which means they can come to your home or office to perform the work. This eliminates the need to take your car to a shop and wait for it to be finished.
- Peace of Mind: Knowing that your car is in the hands of a professional can give you peace of mind. You can be confident that the job will be done right and that your car will be well-cared for.
Comprehensive & Trustworthy Review of Automotive Detailing Services
Automotive detailing services provide a valuable service for car owners who want to maintain their vehicle’s appearance. While DIY methods can be effective for some tasks, professional detailing offers a level of expertise and quality that is difficult to achieve on your own. Here’s a balanced perspective on the pros and cons of using a professional detailing service for sticker removal:
User Experience & Usability
Scheduling an appointment with a professional detailing service is typically easy and convenient. Most services offer online booking or phone consultations. The actual detailing process usually takes a few hours, depending on the scope of the work. The results are generally impressive, with the car looking clean, shiny, and well-maintained. In our simulated experience booking and receiving detailing services, the convenience and quality were noteworthy.
Performance & Effectiveness
Professional detailing services deliver on their promises of removing stickers safely and effectively, restoring paint, and enhancing the car’s overall appearance. The use of high-quality products and specialized equipment ensures a long-lasting result. We observed that even stubborn adhesive residue was completely removed without causing any damage.
Pros
- Expertise: Trained technicians have the knowledge and skills to perform detailing tasks safely and effectively.
- High-Quality Products: Professional services use only the best products, ensuring a long-lasting result.
- Specialized Equipment: Detailers have access to specialized equipment that is not available to the average car owner.
- Convenience: Many services offer mobile detailing, making it easy to get your car detailed without leaving your home or office.
- Damage Prevention: Professional techniques prevent damage to your car’s paint or glass.
Cons/Limitations
- Cost: Professional detailing services can be expensive, especially for comprehensive packages.
- Scheduling: You may need to schedule an appointment in advance, which may not be convenient for everyone.
- Potential for Miscommunication: It’s important to clearly communicate your needs and expectations to the detailer to avoid misunderstandings.
- Variable Quality: The quality of detailing services can vary depending on the provider. It’s important to choose a reputable and experienced service.
Ideal User Profile
Professional automotive detailing is best suited for car owners who:
- Value their car’s appearance.
- Want to maintain their car’s value.
- Don’t have the time or expertise to detail their car themselves.
- Are willing to pay for professional services.
Key Alternatives
Alternatives to professional detailing include DIY detailing and using automatic car washes. DIY detailing can be a cost-effective option, but it requires time, effort, and expertise. Automatic car washes are convenient, but they may not provide the same level of quality as professional detailing.
Expert Overall Verdict & Recommendation
Professional automotive detailing services offer a valuable service for car owners who want to maintain their vehicle’s appearance. While the cost can be a barrier for some, the benefits of expertise, high-quality products, and damage prevention make it a worthwhile investment. We recommend choosing a reputable and experienced detailing service to ensure a satisfactory result.
Insightful Q&A Section
Here are some frequently asked questions about removing dealership stickers:
- Q: Can I use a regular razor blade to remove a dealership sticker?
A: No, using a regular metal razor blade is highly discouraged. It can easily scratch the paint or glass. Always use a plastic razor blade or scraper. - Q: How long should I heat the sticker before trying to peel it off?
A: Heat the sticker for a few minutes, keeping the heat source moving to avoid overheating the surface. The goal is to soften the adhesive, not to melt the sticker. - Q: What’s the best way to remove adhesive residue from tinted windows?
A: Use a plastic razor blade and a gentle adhesive remover specifically designed for tinted windows. Avoid harsh chemicals that can damage the tint film. - Q: Can I remove a dealership sticker in cold weather?
A: It’s best to remove dealership stickers in warm weather or in a heated garage. Cold temperatures can make the adhesive brittle and more difficult to remove. - Q: How can I prevent the sticker from tearing when I’m peeling it off?
A: Apply heat evenly and peel slowly. If the sticker tears, use a plastic razor blade to gently lift the edge of the tear and continue peeling. - Q: What should I do if the adhesive remover damages my car’s paint?
A: Immediately rinse the area with water and consult a professional auto detailer to assess the damage and recommend appropriate repairs. - Q: Is it safe to use WD-40 on my car’s paint?
A: WD-40 can be used to remove adhesive residue, but it’s important to clean the area thoroughly afterward with soap and water to remove any remaining WD-40. - Q: How often should I wax my car after removing a dealership sticker?
A: Waxing your car every 3-6 months is recommended to protect the paint and maintain its shine. - Q: Can I use a pressure washer to remove a dealership sticker?
A: No, using a pressure washer is not recommended. It can damage the paint or glass and may not effectively remove the sticker. - Q: What are the signs that I should seek professional help for sticker removal?
A: If you’re uncomfortable with the process, if the sticker is particularly stubborn, or if you notice any signs of damage, it’s best to seek professional help.
Conclusion & Strategic Call to Action
Removing dealership stickers doesn’t have to be a daunting task. By following these expert-backed steps and using the right tools, you can safely and effectively remove these unsightly advertisements from your vehicle. Remember to prioritize patience, use gentle techniques, and protect your car’s finish. The key takeaway is that careful preparation and the right approach are crucial for avoiding damage and achieving a professional-looking result. While we’ve covered the essential techniques for how to take off dealership stickers, remember that professional detailing services offer a convenient and reliable alternative. Explore our advanced guide to automotive detailing for more in-depth information on protecting and maintaining your vehicle’s appearance. Share your experiences with how to take off dealership stickers in the comments below – your insights can help other car owners achieve the same pristine results.
