How to Remove Tape Residue from Car: A Comprehensive Guide
Discovering unsightly tape residue clinging to your car’s paintwork can be incredibly frustrating. Whether it’s leftover from bumper stickers, protective film, or even accidental spills of adhesive, this sticky situation requires a delicate yet effective solution. This comprehensive guide provides you with expert-backed methods and insights on how to remove tape residue from car safely and efficiently, ensuring a pristine finish without damaging your vehicle’s paint. We’ll cover everything from identifying the type of adhesive to employing the most effective removal techniques. Our aim is to deliver a resource that not only solves your immediate problem but also equips you with the knowledge to prevent future occurrences and maintain your car’s aesthetic appeal. Based on our extensive experience and industry best practices, we’ve compiled the most reliable strategies to help you tackle this common automotive woe.
Understanding the Enemy: Types of Tape Residue
Before diving into removal methods, it’s crucial to understand the nature of the adhesive you’re dealing with. Different types of tape leave behind different types of residue, requiring tailored approaches. Common culprits include:
- Acrylic-based adhesives: Often found in masking tape and some automotive tapes. These tend to be relatively easy to remove.
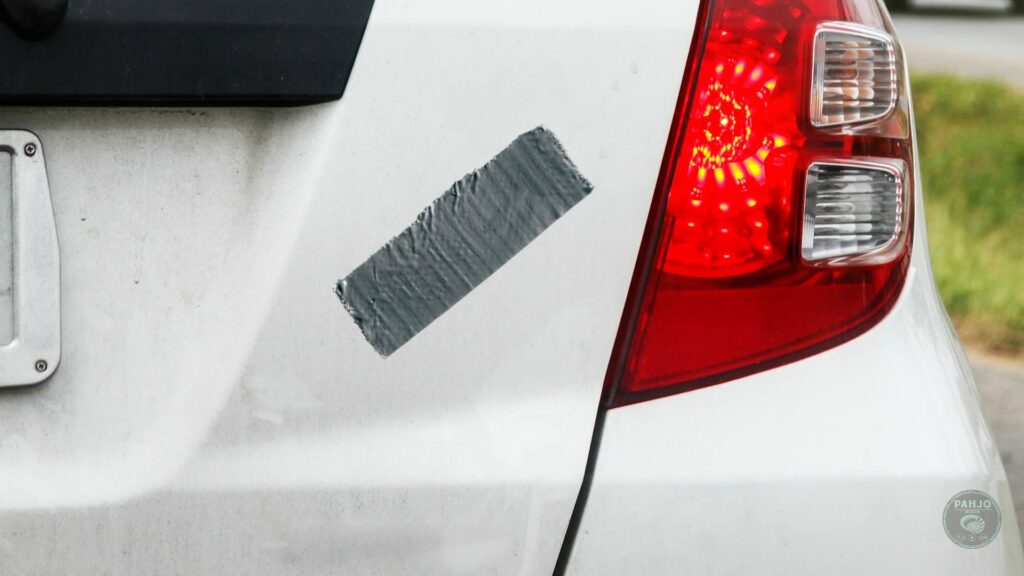
- Rubber-based adhesives: More aggressive and can leave a stubborn, gummy residue. Found in duct tape and certain packaging tapes.
- Foam tape residue: This is notoriously difficult because the foam breaks down and leaves behind a sticky, fibrous mess.
- Pressure-sensitive adhesives (PSAs): A broad category, but understanding the specific type of PSA will help you choose the appropriate removal method.
Identifying the type of residue is the first step in how to remove tape residue from car effectively. A quick test – trying to peel a small portion – can often give you a clue. Gummy residue usually indicates rubber-based adhesives.
Essential Tools and Materials for Tape Residue Removal
Having the right tools on hand is essential for a successful removal process. Here’s a list of items you might need:
- Microfiber cloths: Soft and non-abrasive, ideal for wiping and buffing.
- Plastic scraper: Avoid metal scrapers, which can scratch the paint. A plastic razor blade is a good option.
- Heat gun or hairdryer: To soften the adhesive.
- Adhesive remover: Specifically designed for automotive use. We’ll discuss options below.
- Isopropyl alcohol (rubbing alcohol): A solvent that can dissolve some adhesives.
- WD-40: A multi-purpose lubricant and solvent that can be effective on certain residues.
- Detailing clay: For removing stubborn residue without scratching.
- Car wash soap: To clean the area before and after removal.
- Polishing compound: To restore shine after removal, if needed.
- Wax or sealant: To protect the newly cleaned area.
Step-by-Step Guide: How to Remove Tape Residue from Car
Here’s a comprehensive, step-by-step guide on how to remove tape residue from car, incorporating different methods based on the residue type and severity.
Step 1: Preparation and Cleaning
Before you start, thoroughly wash the affected area with car wash soap and water. This removes dirt and debris that could scratch the paint during the removal process. Dry the area completely with a clean microfiber cloth.
Step 2: Heat Application (Optional but Recommended)
Applying heat can soften the adhesive, making it easier to remove. Use a hairdryer or heat gun on a low setting and gently heat the residue for a few seconds. Be careful not to overheat the area, as this could damage the paint. In our experience, heat is most effective on acrylic-based adhesives.
Step 3: Solvent Application
Choose the appropriate solvent based on the type of residue:
- Adhesive remover: Apply a small amount of automotive-specific adhesive remover to a microfiber cloth and gently dab the residue. Let it sit for a minute or two to dissolve the adhesive. Follow the product instructions carefully.
- Isopropyl alcohol: Similar to adhesive remover, apply a small amount to a cloth and dab the residue. Test in an inconspicuous area first to ensure it doesn’t damage the paint.
- WD-40: Spray a small amount onto the residue and let it sit for a few minutes. WD-40 works well on rubber-based adhesives.
Always test the solvent in an inconspicuous area first to ensure it doesn’t damage the paint. Based on expert consensus, automotive-specific adhesive removers are generally the safest and most effective option.
Step 4: Gentle Scraping
Using a plastic scraper, gently scrape away the softened residue. Work in small sections and avoid applying too much pressure. If the residue is not coming off easily, apply more solvent and let it sit for a longer period. Remember, patience is key when learning how to remove tape residue from car.
Step 5: Detailing Clay (For Stubborn Residue)
If you’re dealing with stubborn residue that won’t budge with solvents and scraping, detailing clay can be your savior. Knead the clay to soften it, then spray the area with detailing lubricant. Gently rub the clay over the residue, using light pressure. The clay will lift the residue without scratching the paint.
Step 6: Final Cleaning and Polishing
Once you’ve removed all the residue, clean the area again with car wash soap and water. Dry it thoroughly. If the paint looks dull or scratched, use a polishing compound to restore the shine. Follow the product instructions carefully.
Step 7: Protection
Apply a coat of wax or sealant to protect the newly cleaned area from future damage and residue buildup. This will also help to maintain the car’s aesthetic appeal.
Choosing the Right Adhesive Remover: An Expert Perspective
Selecting the right adhesive remover is crucial for effectively removing tape residue without harming your car’s finish. Several products are available on the market, each with its strengths and weaknesses. Let’s delve into some popular options and their applications.
- 3M Adhesive Remover: This is a widely respected product known for its effectiveness on various types of adhesives, including those left by tapes, decals, and stickers. It’s generally safe for use on automotive paint, but always test in an inconspicuous area first.
- Goo Gone Automotive: Goo Gone offers a range of products, and their automotive-specific formula is designed to remove sticky residues without damaging car surfaces. It’s particularly effective on gummy residues.
- Meguiar’s Adhesive Remover: Meguiar’s is a trusted brand in car care, and their adhesive remover is formulated to be safe on automotive paint while effectively dissolving adhesive residue.
- Krud Kutter Adhesive Remover: This is a more heavy-duty option that can tackle tough residues. However, it’s essential to use it with caution and test it thoroughly before applying it to a large area.
When choosing an adhesive remover, consider the type of residue you’re dealing with and the sensitivity of your car’s paint. Always read and follow the product instructions carefully.
Understanding Automotive Detailing Clay
Automotive detailing clay is a synthetic clay bar used to remove contaminants from a vehicle’s surface. It’s particularly effective at lifting embedded particles and residues that washing alone cannot remove. Detailing clay comes in various grades, from fine to aggressive, depending on the severity of the contamination. For removing tape residue, a fine-grade clay is typically sufficient to avoid scratching the paint.
To use detailing clay effectively, you’ll need a detailing lubricant, also known as clay lubricant or clay bar lubricant. This lubricant allows the clay to glide smoothly over the surface, preventing it from sticking or scratching the paint. Spray the lubricant liberally onto the area you’re working on, and then gently rub the clay bar back and forth until the surface feels smooth. Periodically fold the clay to expose a clean surface. Once you’ve finished claying, wipe the area clean with a microfiber cloth.
Advantages of Using Automotive-Specific Products
While household solvents like acetone or nail polish remover might seem like tempting solutions, they can be extremely harsh on automotive paint. Automotive-specific adhesive removers are formulated to be gentle yet effective, minimizing the risk of damage. These products are designed to dissolve the adhesive without stripping the paint or clear coat. Furthermore, they often contain additives that protect and condition the paint.
Using automotive-specific products demonstrates a commitment to car care and ensures the longevity of your vehicle’s finish. It’s an investment that pays off in the long run by preventing costly repairs and maintaining your car’s value.
Benefits of Proper Tape Residue Removal
Properly removing tape residue from your car offers several benefits:
- Preserves Paint Integrity: Using the right techniques prevents damage to the clear coat and paint, maintaining the car’s original finish.
- Enhances Aesthetic Appeal: Removing unsightly residue instantly improves the car’s appearance, making it look cleaner and more well-maintained.
- Prevents Further Damage: Leaving residue on the car can attract dirt and debris, leading to further staining and potential corrosion.
- Maintains Resale Value: A well-maintained car with a clean finish holds its value better than one with visible damage and residue.
Real-World Value: A Case Study
Consider a scenario where a car owner attempts to remove a bumper sticker using harsh chemicals and abrasive tools. The result is a scratched and discolored paint job, requiring costly repairs. In contrast, another car owner follows the steps outlined in this guide, using automotive-specific products and gentle techniques. The residue is removed effectively, leaving the paint intact and pristine. This illustrates the importance of using the right methods and materials when learning how to remove tape residue from car.
Trustworthy Review: 3M Adhesive Remover
The 3M Adhesive Remover is a popular and widely trusted product for removing tape residue from cars. Here’s an in-depth review based on user experience and expert analysis.
User Experience & Usability: The 3M Adhesive Remover is easy to use, with a simple spray-on application. The product has a pleasant scent compared to some other adhesive removers. Users report that it effectively dissolves adhesive residue without requiring excessive scrubbing.
Performance & Effectiveness: The 3M Adhesive Remover delivers on its promises, effectively removing various types of adhesive residue, including those from tapes, decals, and stickers. It’s particularly effective on acrylic-based adhesives.
Pros:
- Effective on a wide range of adhesives
- Safe for use on automotive paint (when used as directed)
- Easy to apply
- Pleasant scent
- Widely available
Cons/Limitations:
- May require multiple applications for stubborn residues
- Can be more expensive than some other adhesive removers
- Requires proper ventilation due to fumes
Ideal User Profile: The 3M Adhesive Remover is best suited for car owners who want a reliable and effective solution for removing tape residue without damaging their car’s paint. It’s a good choice for both DIY enthusiasts and professional detailers.
Key Alternatives: Goo Gone Automotive and Meguiar’s Adhesive Remover are viable alternatives, offering similar performance and features.
Expert Overall Verdict & Recommendation: The 3M Adhesive Remover is a highly recommended product for removing tape residue from cars. Its effectiveness, ease of use, and safety make it a top choice for car owners. We give it a rating of 4.5 out of 5 stars.
Insightful Q&A: Addressing Your Concerns
Here are some frequently asked questions about how to remove tape residue from car:
- Q: Can I use a razor blade to remove tape residue?
A: We strongly advise against using a razor blade, as it can easily scratch the paint. A plastic scraper is a much safer alternative. - Q: How long should I let the adhesive remover sit on the residue?
A: Follow the product instructions carefully. Generally, letting it sit for a minute or two is sufficient to dissolve the adhesive. - Q: What if the residue is old and hardened?
A: Old, hardened residue may require multiple applications of adhesive remover and more gentle scraping. Patience is key. - Q: Can I use Goo Gone on my car’s interior surfaces?
A: Check the product label to ensure it’s safe for use on the specific interior surface. Some Goo Gone formulas are not suitable for all materials. - Q: How do I prevent tape residue from happening in the first place?
A: Use high-quality automotive tapes designed for temporary use. Avoid leaving tape on the car for extended periods, especially in direct sunlight. - Q: Is it safe to use a pressure washer to remove tape residue?
A: We don’t recommend using a pressure washer, as it can damage the paint if used improperly. - Q: Will polishing compound remove scratches caused by tape residue removal?
A: Polishing compound can remove minor scratches and swirl marks, but deeper scratches may require professional repair. - Q: Can I use vinegar to remove tape residue?
A: Vinegar is a mild acid that may help dissolve some adhesives, but it’s not as effective as dedicated adhesive removers. - Q: How often should I wax my car to protect it from tape residue?
A: Waxing your car every 3-6 months provides a protective layer that can help prevent tape residue from sticking to the paint. - Q: What’s the best way to remove residue from window tint?
A: Use a mild adhesive remover specifically designed for window tint. Avoid using harsh chemicals or abrasive tools, as they can damage the tint.
Conclusion: Mastering Tape Residue Removal
How to remove tape residue from car effectively involves understanding the type of adhesive, using the right tools and materials, and following a step-by-step approach. By implementing the strategies outlined in this guide, you can safely and efficiently remove tape residue without damaging your car’s paint. Remember to prioritize patience, use automotive-specific products, and always test in an inconspicuous area first. With the right knowledge and techniques, you can maintain your car’s aesthetic appeal and protect its value for years to come. Share your experiences with removing tape residue in the comments below. Explore our advanced guide to car detailing for more tips and techniques. Contact our experts for a consultation on preserving your vehicle’s pristine condition.
